
Key Takeaways
A dependable mobile automotive locksmith setup begins with a clear service scope, not a shopping cart. Match every tool, blank, machine, and subscription to the vehicles and jobs you actually intend to serve.
- Define your vehicle coverage and legal responsibilities before buying equipment.
- Build an entry kit that prioritizes controlled, non-destructive access.
- Treat cutting, programming, power support, and inventory as one workflow.
- Organize the vehicle so essential tools remain secure and reachable.
- Test equipment regularly and measure whether each upgrade earns its space.
1. Start with your service scope and vehicle coverage
An Automotive Locksmith Equipment Checklist 2026 should begin with the work you plan to accept. A technician who handles roadside lockouts needs a different setup from one who also cuts keys, programs proximity systems, or supports fleet accounts. Write down the jobs, vehicle age ranges, and service radius first. That simple exercise keeps expensive tools from becoming unused cargo.
Define the automotive locksmith services you will offer
List your core services in plain language: vehicle entry, broken-key extraction, duplicate keys, replacement keys, remote pairing, transponder programming, or ignition-related work. Then decide which jobs you will perform immediately and which you will refer out. Your service menu should reflect your training, available equipment, and willingness to handle the responsibility of each job.
A small operation may start with emergency entry and common duplicate keys, then add programming after the workflow is dependable. That is often safer than promising every possible service on day one. Consider using an essential locksmith tools reference as a broad planning aid, but verify any purchase against your own vehicle coverage and training.
Match equipment to vehicle makes, models, and years
Vehicle coverage is more useful than a vague claim that a programmer supports “most cars.” Create an application list with makes, model families, model years, key types, and known programming conditions. Record whether each job requires a blade cut, a transponder, a remote, a smart key, a PIN, an online account, or a security-gateway procedure.
Keep the list practical and update it after real jobs. A tool that works well for one year range may not cover the next revision, even when the vehicle name is unchanged. Your database should also identify what must be verified before dispatch, so the technician is not discovering a coverage gap beside the customer’s vehicle.
Separate emergency-entry work from key-programming work
Entry work and programming work carry different risks and require different preparation. Entry tools must be chosen for controlled access without unnecessary contact with glass, seals, airbags, wiring, or trim. Programming work depends more heavily on accurate vehicle identification, compatible software, stable voltage, and a suitable replacement key.
Build separate kits or labeled compartments for these workflows. That separation speeds up roadside decisions and makes it easier to see what is missing. It also prevents a basic lockout call from turning into an improvised programming attempt simply because a device happens to be in the van.
Account for regional licensing, insurance, and compliance requirements
Before taking paid calls, check local locksmith licensing, business registration, advertising rules, background-check requirements, and vehicle-entry restrictions. Requirements can vary by state, county, or municipality. Keep records of training, customer authorization, invoices, and vehicle information in a way that supports a clear audit trail.
Insurance deserves the same attention as equipment. A useful insurance coverage guide can help you frame questions for an agent about general liability, commercial auto, tools and equipment, workers’ compensation, and other policies that may fit your operation. Do not treat an online summary as a substitute for local legal or insurance advice.
2. Build your essential entry and lockout kit
A mobile entry kit should be compact, deliberate, and gentle on the vehicle. The objective is controlled access, not force. Start with tools that let you create and maintain a small working gap, reach the correct control, and withdraw without leaving marks or disturbing safety systems.
Choose professional wedges, long-reach tools, and air pumps
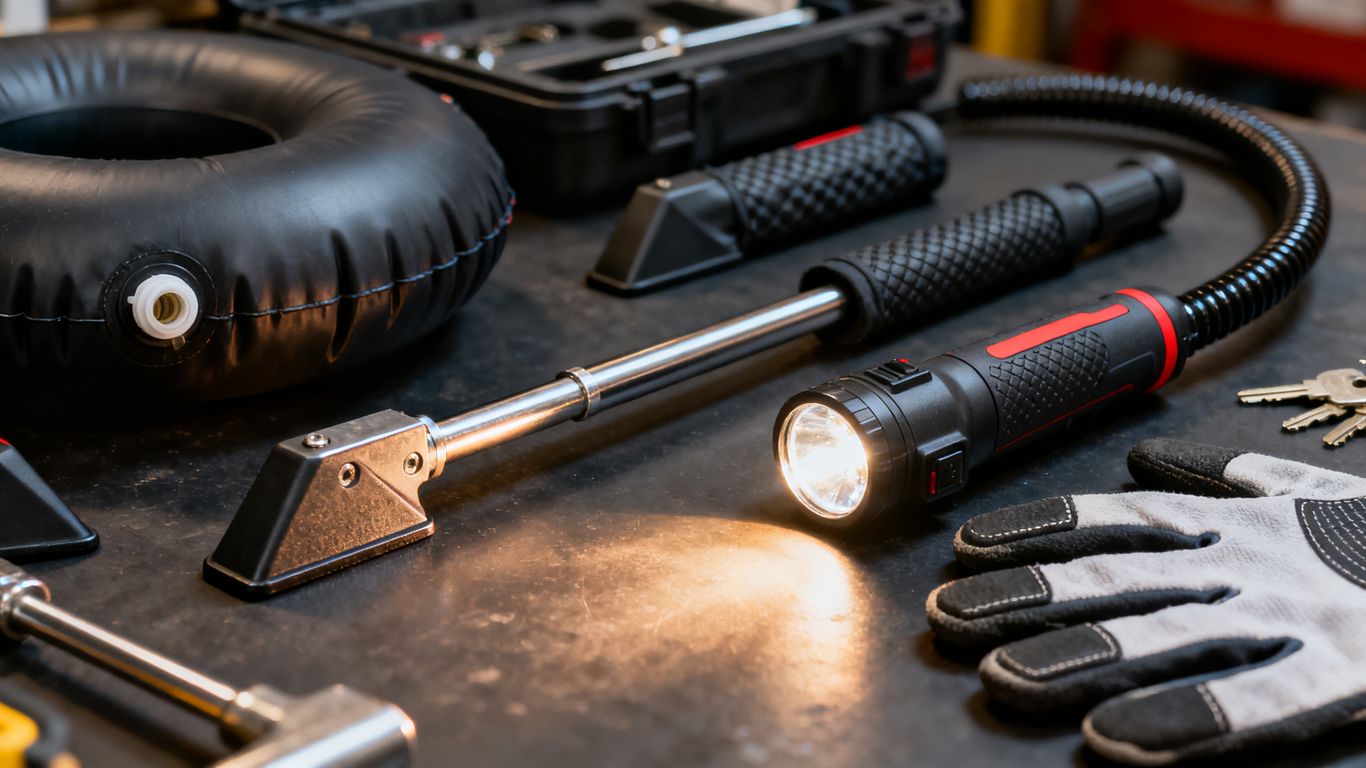
Use wedges designed for automotive work rather than improvised objects. Pair them with long-reach tools in different lengths and shapes, along with an air pump that gives you gradual control over the opening. A pump with a reliable valve is easier to manage than equipment that expands suddenly.
Inspect every contact surface before a call. A nicked wedge, rough edge, or bent reach tool can turn a routine opening into paint or weather-seal damage. Keep protective sleeves and a small inspection light close to the entry tools so the technician can check the working area before applying pressure.
Add non-destructive decoding and bypass tools
An entry kit should include methods for understanding the lock or operating the intended control without drilling or destructive removal whenever authorized and appropriate. Picks, probes, bypass tools, and vehicle-specific references can help, but they only belong in the hands of a trained technician who has verified customer authorization.
Carry a range rather than one universal tool. Different lock profiles, handle arrangements, and interior release designs can make a familiar technique unsuitable. A quiet, methodical approach is usually more valuable than adding another specialized tool that the team has never practiced with.
Prepare tools for common vehicle lock and handle designs
Group tools by the vehicle features they address: exposed or shielded handles, conventional blades, cable-operated releases, electronic buttons, and different interior control positions. The groupings do not need to predict every design. They need to help a technician find a sensible starting point quickly.
Keep a vehicle reference system in the same compartment as the tools. It can be a current digital database, printed notes, or both. Before inserting anything, confirm the vehicle, the entry point, and the intended control rather than relying on memory from a similar model.
Protect paint, weather seals, airbags, and interior trim
Protection is part of the entry kit, not an optional accessory. Add protective film, edge guards, soft sleeves, trim wedges, clean gloves, and a bright inspection light. Avoid placing metal tools against painted surfaces, and keep the working gap away from curtain airbags and wiring whenever the vehicle design requires it.
Use a short pre-entry check: verify authorization, inspect the door and surrounding paint, identify the safest access point, and photograph existing damage when appropriate. That record protects both the customer relationship and the business. It also encourages technicians to slow down during the few seconds when careless pressure causes most avoidable damage.
3. Stock key cutting and duplication equipment
Key cutting is a workflow, not just a machine purchase. The right setup depends on whether you cut mainly at a shop, at the roadside, or in a vehicle that must remain organized while moving between calls. Consider machine footprint, power needs, cutter availability, calibration, clamping options, and the support required when something goes wrong.
Compare portable, manual, and electronic key machines
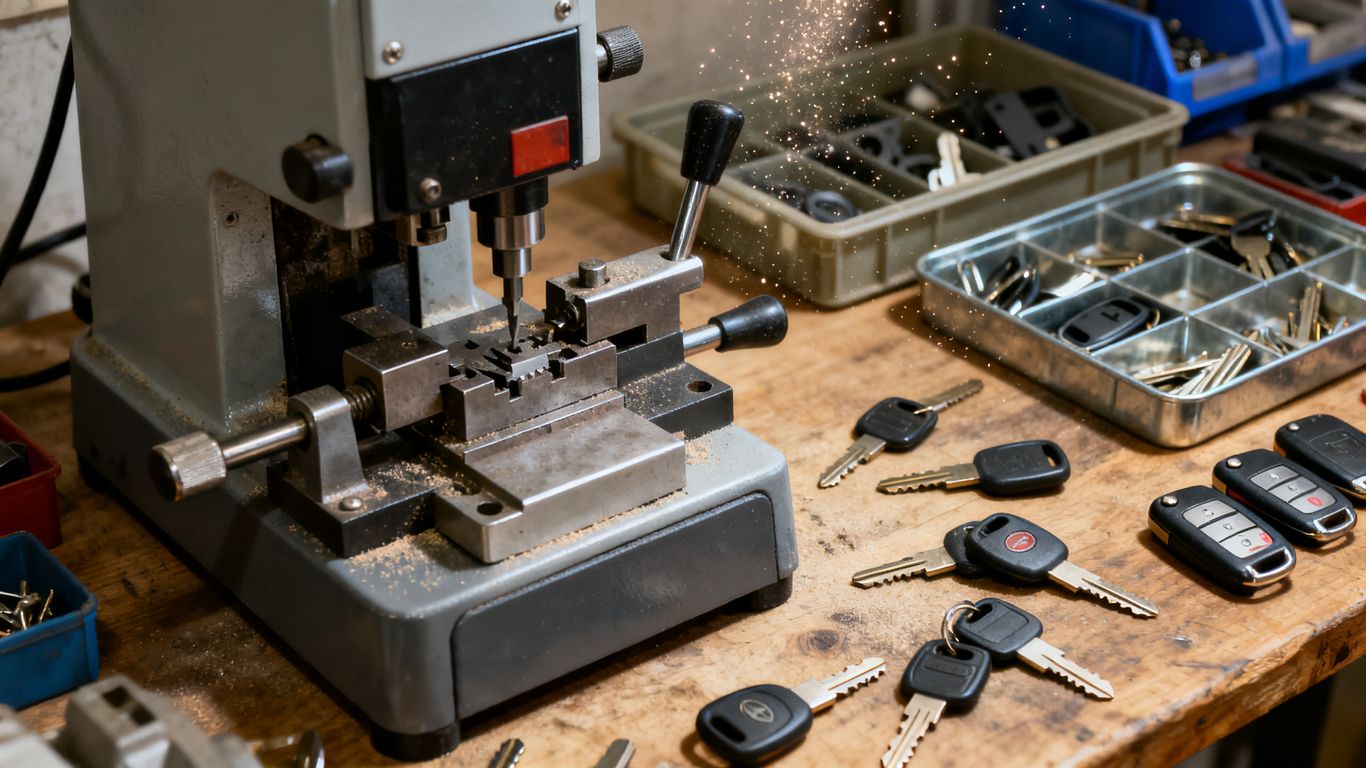
A portable machine can support roadside duplication, while a manual unit may offer a straightforward backup with fewer electronic dependencies. Electronic machines can add consistency and application coverage when properly configured, but they also require software, maintenance, clean power, and operator familiarity.
Compare the whole operating cost rather than the sticker price. Include cutters, adapters, calibration time, replacement parts, training, batteries, and the space needed to secure the machine. For a small mobile business, a dependable primary machine plus a realistic fallback may be more useful than several overlapping machines.
Select automotive clamps, adapters, and cutting accessories
The machine is only as useful as its contact with the key. Choose clamps and adapters that match the key families you intend to cut, and keep the correct cutter types together with their gauges and cleaning tools. A labeled accessory case prevents the common mistake of carrying the machine but not the small component that makes a particular application possible.
Check cutter condition before dispatch. Dull or damaged cutters can create heat, rough edges, inaccurate depths, and unnecessary rework. Store spare cutters in protective containers and record which applications each one serves, especially when several technicians share inventory.
Organize blank keys, transponder keys, and remote shells
Separate mechanical blanks from transponder keys, remote shells, and complete remotes. Within each group, sort by manufacturer, application, blade profile, and generation. Do not assume that a shell, blade, chip, and remote board are interchangeable simply because they look similar.
A useful supply arrangement has a fast-access tray for high-demand applications and a protected reserve for less common parts. Wholesale locksmith supplies may help you research sourcing options, but confirm compatibility, return terms, and programming requirements before committing to quantities.
Verify key-cutting accuracy before dispatching to customers
Every cut should be checked before the technician leaves the work area or hands the key to the customer. Test the finished key in the appropriate lock or cylinder when possible, inspect shoulder and edge quality, and confirm that the cut matches the intended application. A key that turns once but binds later is not a successful job.
Use a repeatable inspection record for new machines and unfamiliar blanks. It can include the blank reference, machine setting, cutter condition, and test result. The record gives you a way to distinguish a bad blank from an incorrect setup and helps the next technician avoid repeating the same error.
4. Choose the right key programming and diagnostic tools
Programming equipment is where vehicle coverage, subscriptions, security procedures, and power quality meet. A device may be technically capable yet unsuitable for your business if the relevant makes are outside its coverage or the required account access is unavailable. Treat each purchase as a service decision, not as a race to collect the newest screen or interface.
Understand transponder, remote, smart-key, and proximity systems
Start by distinguishing the job types. A transponder may affect engine authorization, while a remote operates locking functions; a smart key or proximity system may combine several functions with vehicle-specific enrollment steps. The physical key, electronic board, chip, and vehicle security system should all be identified before work begins.
Ask for the original key status, the number of working keys, the customer’s identification, and the exact vehicle information. Those details influence the correct procedure and the parts you need. When the information is incomplete, pause and verify rather than treating a similar-looking key as a safe substitute.
Evaluate OBD programming devices and manufacturer coverage
Compare devices by documented vehicle coverage, supported functions, update terms, technical support, cable quality, and the clarity of their application search. Separate “diagnostic” functions from “programming” functions in your notes. A tool may communicate with a vehicle without supporting the specific key procedure you need.
Keep a coverage matrix that records model year, system type, required accessories, and whether an online connection is involved. Automotive locksmithing programming resources can provide useful background when comparing workflows, but the final decision should follow the manufacturer’s current documentation and your own test results.
Plan for security gateways, PIN codes, and online subscriptions
Some vehicles require additional authorization, a PIN, an account, a token, or an internet connection before programming can proceed. Build those requirements into scheduling and pricing. Confirm access before dispatch when the job description suggests that a security gateway or code may be involved.
Keep account credentials protected and assign responsibility for renewals. Record subscription expiration dates, supported regions, and any per-use charges in one administrative calendar. A programmer that cannot be used because an account expired is not available equipment, even if it is physically in the van.
Use battery support and stable voltage during programming
Voltage support reduces the risk created by a weak vehicle battery or prolonged ignition-on time. Select a suitable support unit, inspect its leads, and learn its operating limits before using it on a customer vehicle. The support device should not replace a basic battery and connection check.
Prepare a quiet programming routine: turn off unnecessary loads, connect support correctly, confirm voltage, and follow the documented sequence without interruption. Keep a recovery plan for failed communication, including technical support details and a way to explain the situation clearly to the customer.
5. Equip your mobile locksmith vehicle
The vehicle is the technician’s workshop, storage room, and customer-facing workspace. A good layout reduces searching, prevents tools from shifting, and leaves enough room to work safely. Design it around the order of a typical call: verification, entry, decoding or cutting, programming, testing, payment, and documentation.
Design a secure layout for machines, tools, and inventory
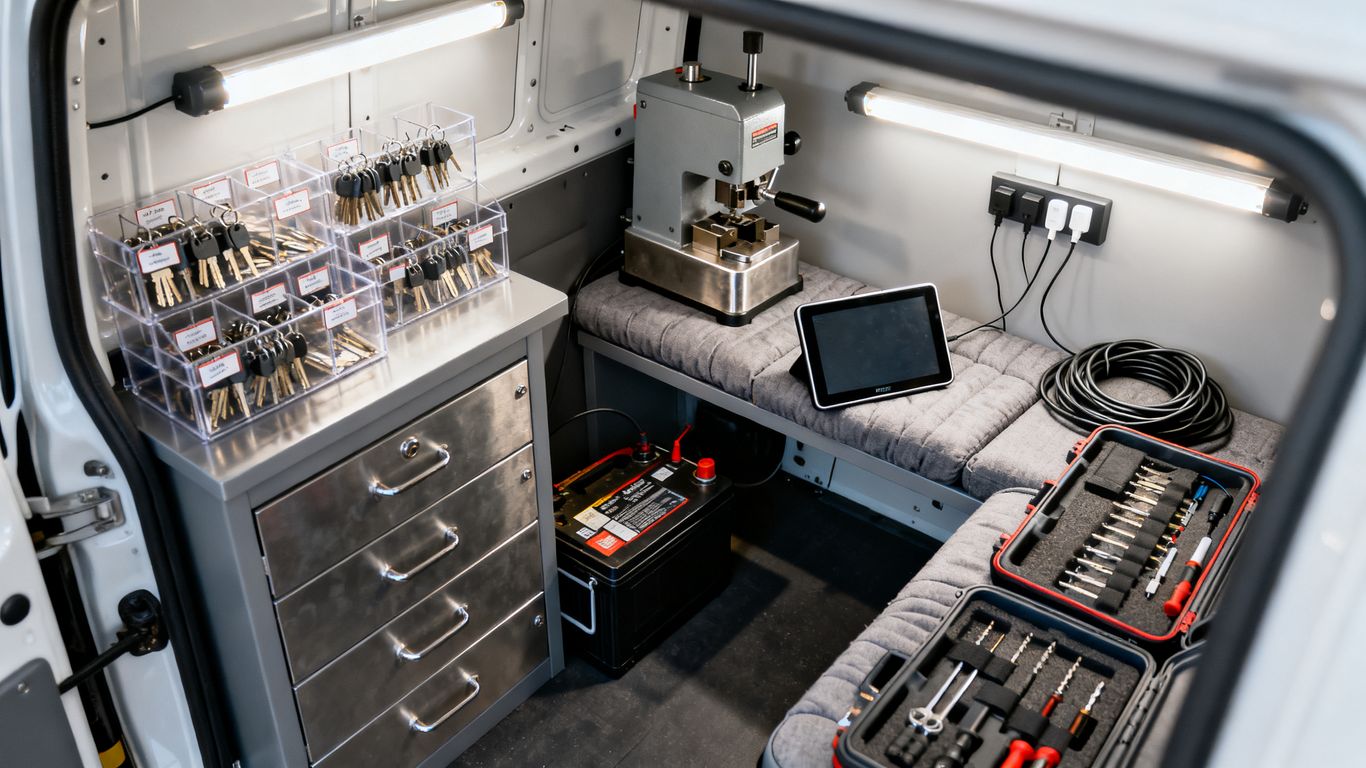
Place frequently used entry tools where they can be reached without unloading the vehicle. Secure cutting machines and diagnostic devices against movement, then reserve closed storage for keys, remotes, and sensitive customer information. Use drawers or cases that remain shut during travel.
Create zones for entry, cutting, programming, electrical support, and paperwork. The zones should be visible enough for a quick inventory check but not exposed to passersby when the rear doors are open. A good layout saves small amounts of time on every call, which becomes meaningful over a full week.
Add power inverters, batteries, lighting, and charging stations
Calculate the load of machines, chargers, lights, and support equipment before choosing an inverter or auxiliary battery. Include startup demand, cable length, ventilation, and safe mounting. A charging station should prevent loose cables from becoming trip hazards or tangling around tools.
Use bright, even task lighting inside the vehicle and a portable light for roadside work. Label chargers by device and keep one known-good cable with each critical tool. Power planning is less glamorous than buying a programmer, but it determines whether that programmer is usable after dark or far from a shop.
Protect equipment from heat, moisture, vibration, and theft
A parked vehicle can become extremely hot, while roadside work can expose tools to rain, dust, and uneven ground. Use cases, desiccant where appropriate, padded mounting, and moisture-resistant storage. Do not leave electronics in direct sun or assume a closed case makes them safe from temperature swings.
Layer physical security with operating habits. Lock the vehicle whenever you step away, keep an inventory of serial numbers, and avoid displaying high-value equipment through the windows. Protection also includes cleaning: metal filings, grit, and moisture can shorten the life of machines and connectors.
Keep backup tools and emergency supplies ready for roadside work
A mobile technician needs a small reserve for the problems that stop a job rather than merely slow it. Build that reserve around the most likely failures and the distance from your base. Keep critical items separate from the primary kit so one misplaced case does not remove every option.
A practical emergency reserve may include:
- Spare batteries and charging cables for essential devices.
- Replacement fuses, connectors, and basic hand tools.
- Protective gloves, eye protection, and a bright portable light.
- Rain protection, warning equipment, and a first-aid kit.
After each difficult call, ask which missing item would have shortened the delay. Add only what has a clear use, then secure it in a labeled backup compartment. This keeps the reserve useful instead of turning it into another disorganized box.
6. Add inventory, consumables, and customer-ready supplies
Inventory affects both job speed and cash flow. Carrying too little creates return trips, while carrying too much ties up money and makes the vehicle harder to audit. Begin with applications that match your documented service area, then let completed job records guide expansion.
Organize blanks, remotes, batteries, chips, and emergency keys
Separate parts by function before sorting them by vehicle application. Mechanical blanks, transponder keys, remotes, batteries, chips, and emergency blades each need their own location. Keep complete assemblies apart from components so a technician does not mistake a shell or empty board for a ready-to-program key.
Use small, durable bins and reserve a protected area for delicate electronics. Record quantity, compatibility, and reorder information at the bin level. When a part is used, the technician should be able to mark it down immediately rather than relying on memory at the end of the day.
Stock picks, probes, shims, lubricants, and replacement hardware
Consumables are easy to overlook because they are inexpensive individually. Yet a missing lubricant, damaged probe, worn shim, or absent replacement clip can stop an otherwise simple call. Keep spares for the items that wear, bend, dry out, or disappear most often.
Choose products that suit the vehicle work you actually perform. Lubricants should be used according to their intended application, and replacement hardware should be matched carefully rather than forced into place. The goal is a clean repair, not merely a temporary way to close the door.
Label inventory by vehicle application and programming requirements
A label should answer the technician’s immediate questions: what vehicle does this fit, what functions does it support, what blade or chip is included, and what programming conditions apply? Add a clear distinction between “ready to use,” “needs cutting,” and “needs programming.”
Use consistent abbreviations and keep digital records aligned with physical labels. If an item has a security-gateway requirement, PIN dependency, or subscription condition, place that warning where it will be seen before dispatch. This is where clear inventory labels prevent avoidable customer delays.
Track costs, replenishment levels, and high-demand parts
Track purchase cost, selling price, usage, failed parts, returns, and the time spent sourcing replacements. Set a minimum quantity for high-demand items and a lower review threshold for slow-moving inventory. Review those levels monthly rather than guessing from a crowded shelf.
Inventory decisions should also fit the payment and dispatch process. PreDispatch helps service businesses collect payments or deposits before dispatching technicians, which can make it easier to avoid sending a van toward a low-commitment call. Use that operational step alongside accurate parts checks; collecting before dispatch does not remove the need to confirm the job details.
7. Maintain, test, and upgrade your equipment in 2026
Equipment reliability is built between calls. A machine that worked last month may have a worn cutter, an outdated database, a weak cable, or a subscription that is about to expire. Set aside a short maintenance period each day and a more complete review each week.
Create daily inspection and equipment testing routines
Before leaving the yard, inspect entry tools, cutting equipment, programmers, power support, lighting, and inventory. Check for bent shafts, damaged insulation, loose connections, low batteries, missing adapters, and depleted consumables. Test the tools that can be tested without a customer vehicle, and record anything that needs attention.
At the end of the day, return every item to its assigned location and note parts used. A simple sign-off routine exposes patterns quickly. If the same cable or cutter is repeatedly missing or failing, it deserves a process change rather than another last-minute purchase.
Keep software, firmware, subscriptions, and databases current
Updates can change coverage, procedures, interfaces, and compatibility. Maintain a calendar for software, firmware, subscriptions, account access, and database reviews. Read release notes where available and test important updates in a controlled setting before relying on them on the roadside.
Keep a fallback record of the previous working configuration and technical-support contacts. Automotive locksmithing guides may help with general education, while device and vehicle manufacturers remain the appropriate source for current operating instructions. Do not update every device immediately before a busy service period.
Build a replacement plan for aging or unsupported tools
Replacement should be based on risk and workload, not novelty. Identify tools that are unsupported, difficult to repair, incompatible with the vehicles you now serve, or too slow for the jobs they handle. Estimate the cost of downtime and failed jobs alongside the purchase price.
Retire equipment in stages when possible. Keep a proven backup during the transition, train technicians on the replacement, and update the vehicle layout at the same time. A new device has little value if it is stored without the cables, account access, adapters, or practice needed to use it correctly.
Measure equipment performance, job profitability, and service coverage
Review completion rates, return visits, programming failures, cutting rework, time spent searching for tools, and parts that expire or sit unused. Compare those figures with the jobs your service menu promises. The results show whether the bottleneck is equipment, training, inventory, customer information, or dispatch preparation.
PreDispatch is designed to help field service businesses manage calls more efficiently and collect payments or deposits before dispatch. For a locksmith operation, that administrative discipline belongs in the same review as van utilization and equipment performance: a well-equipped technician still loses time when the job is poorly qualified or cancelled late.
Conclusion
The strongest mobile locksmith setup is not the one with the most equipment. It is the one that matches a defined vehicle coverage area, protects the customer’s car, supports accurate cutting and programming, stays organized under roadside pressure, and is maintained as deliberately as the business itself.
Frequently Asked Questions
What should a new automotive locksmith buy first?
Start with professional entry tools, protective accessories, basic hand tools, a reliable light, customer-verification materials, and a clear vehicle coverage list. Add cutting and programming equipment only after deciding which services and applications you will support.
How do I choose a key programming tool?
Compare documented make, model, and year coverage with the specific functions you need. Also check required subscriptions, security-gateway procedures, PIN access, cables, technical support, update terms, and battery-support requirements.
Is a portable key-cutting machine enough for mobile work?
It can be enough for a focused service menu, provided it supports the key applications you accept and can be secured and powered safely. Confirm accuracy with test cuts and keep suitable cutters, clamps, adapters, and a practical backup plan.
How should locksmith tools be arranged in a van?
Keep frequently used entry tools immediately accessible, secure machines against movement, and separate cutting, programming, electrical, and inventory zones. Use labeled cases and closed storage so equipment remains protected and easy to count.
How much inventory should a mobile locksmith carry?
Carry the parts that match your recent job history, service area, and promised coverage. Set minimum quantities for high-demand blanks, batteries, remotes, and other essential parts, then review usage and failed or returned items regularly.
How often should automotive locksmith equipment be tested?
Perform a short inspection before each workday, clean and restore tools after calls, and schedule a more complete weekly or monthly review. Test unfamiliar or updated equipment in a controlled setting before using it for a customer.
What non-equipment preparation matters most on a lockout call?
Verify authorization, identify the vehicle accurately, confirm the requested service, check likely parts and programming requirements, and communicate pricing and timing clearly. Good preparation reduces avoidable delays and helps the technician choose the least risky procedure.